This knowledge base article will help you to manage your Linux/Windows VPS Server from your client area (Use your client portal to manage your Linux/Windows VPS).
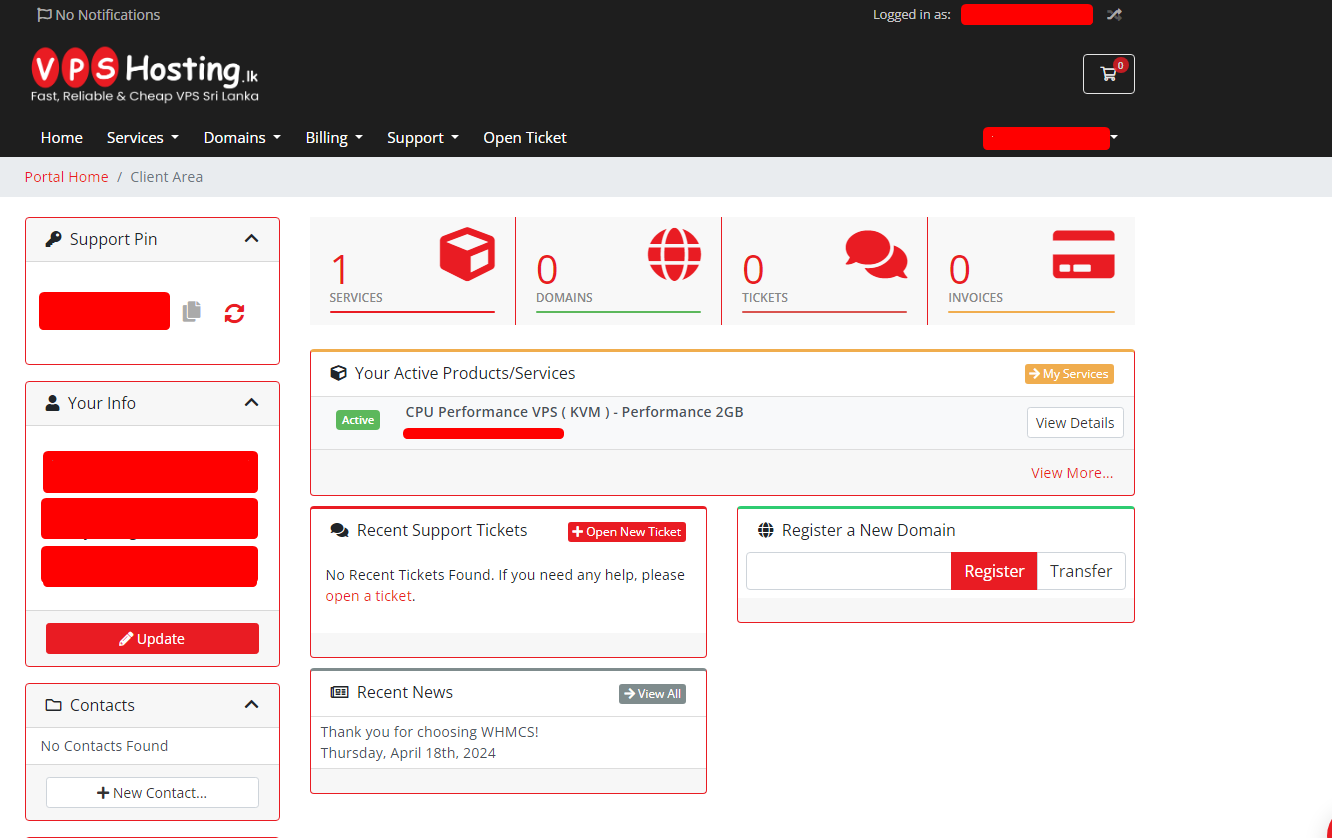
1. Log in to the Client Area.
Login: vpshosting.lk - client area
2. Go to Services > My Services
Then click the Product / Services of your VPS.
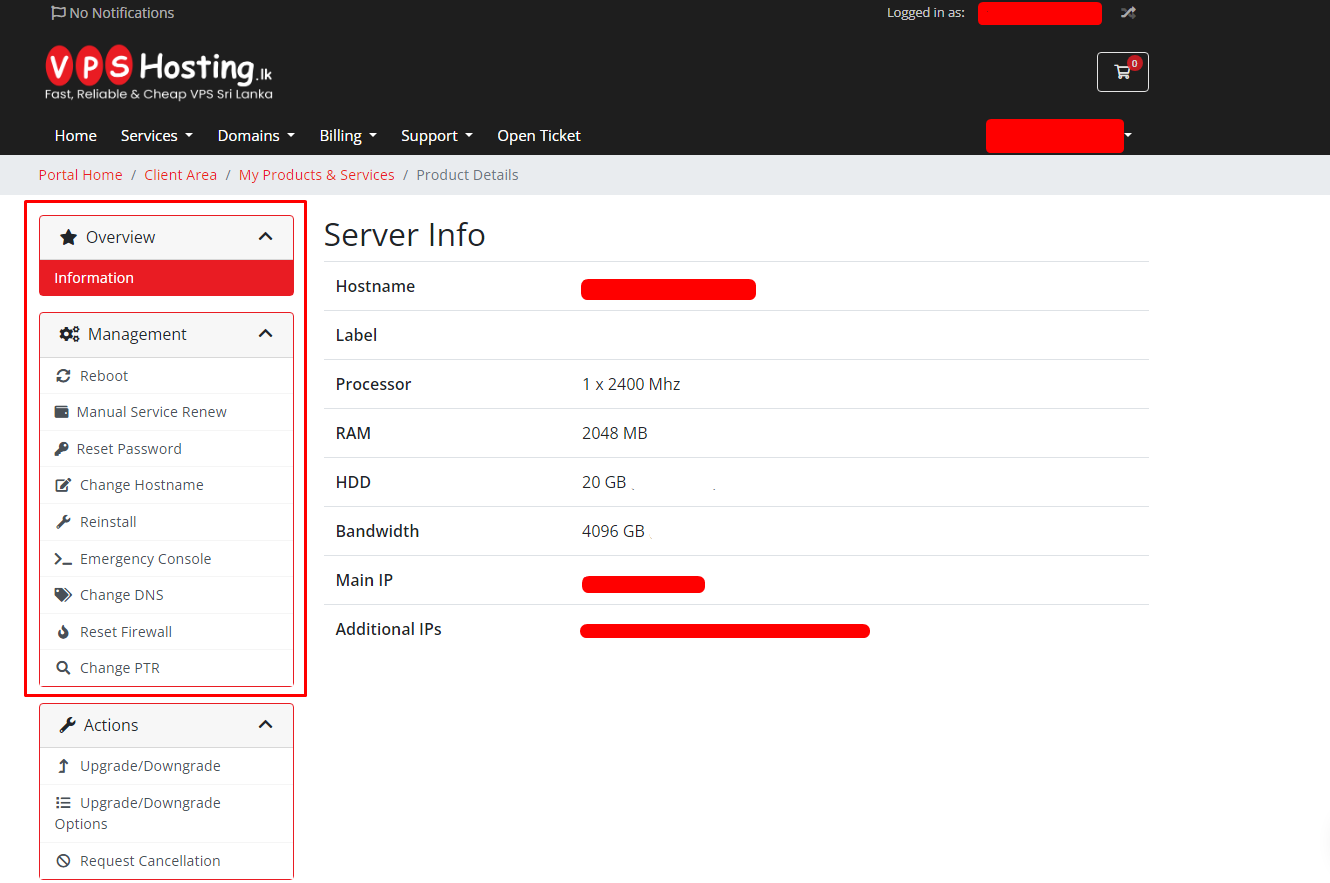
3. Now you will see the product information including,
– Management Menu
– Actions Menu
– Server Information Menu
In the management tab, you would see Virtual Server Control Options. Here, you would see the following VPS Management options.
Reboot: This option Visible if you have installed the OS to your VPS.
Manual Service Renew: This option allows you to create an invoice to renew your server.
Reset Password: This option allows you to reset your VPS password.
Change Hostname: This option used to change the hostname of your VPS
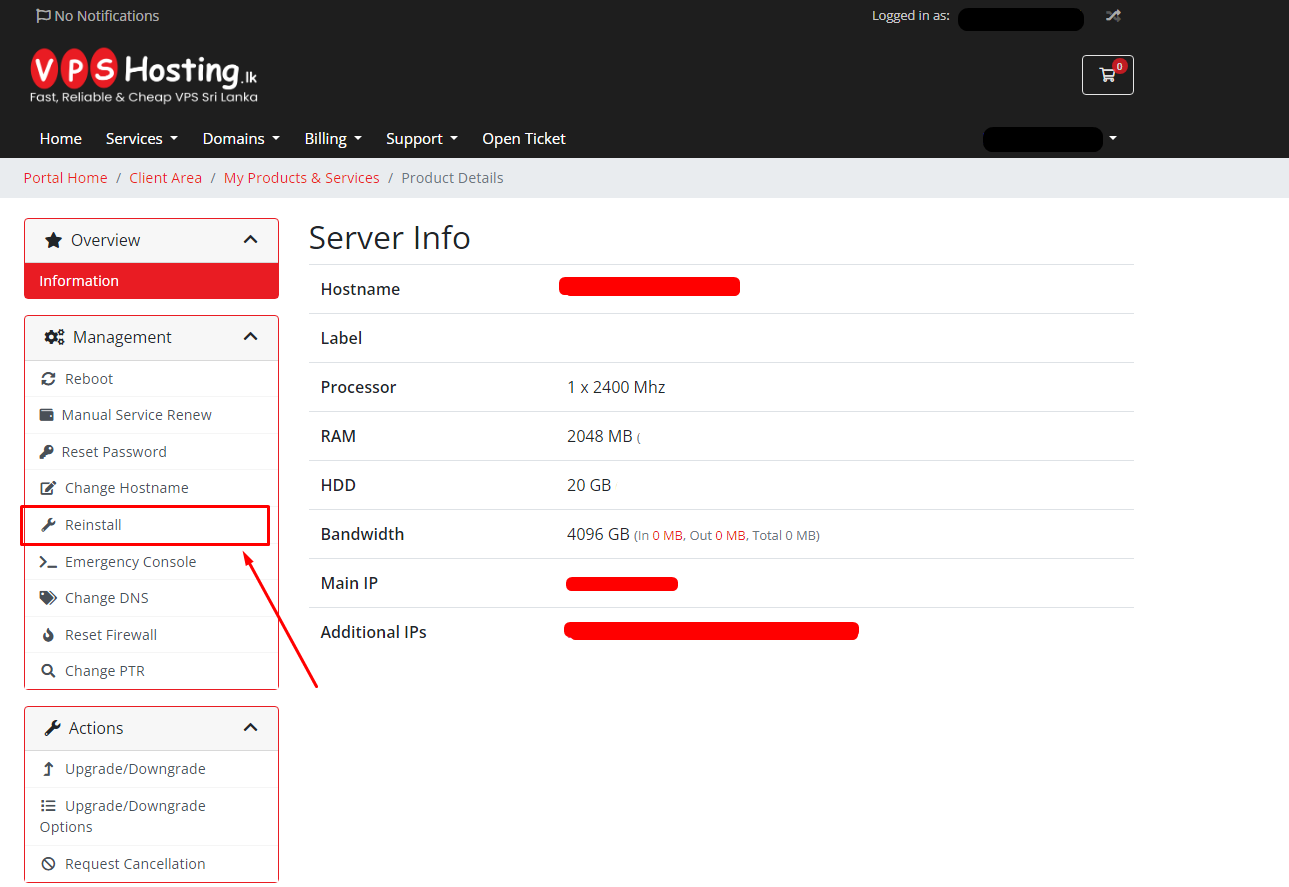
Install/Reinstall: You can use this option to install or reinstall OS to your VPS
Emergency Console: In case you are unable to connect to your VPS through SSH, you can have serial console access to your VPS through this option.
Change DNS: This option allows you to update your DNS
Reset Firewall: This allows you to manage your VPS firewall.
Change PTR: This allows to setup your reverse DNS settings
Actions Tab show you upgrade/downgrade options available for your VPS, and Server Information tab has your current server’s resource usage and other monitoring details.
4. Installing OS to your VPS
In your management tab, choose the Install/Reinstall option. This allows you to install your required OS to your VPS. When you click it you will see a dropdown of the OS list(Windows images for Windows VPS and Linux images for Linux VPS). select an OS and Reinstall will install your OS to your VPS. After installation, you can find the login details for your VPS as below. Use them with SSH or RDP to access your VPS server.
Note: Install/Reinstall OS will erase your data. Make sure to tick the option in the OS installation window before clicking the install/reinstall server.